Quick-start guide
From manuscript to finished book
Ten minutes with this guide and you'll know your way around: bring in your writing, make it look like a book, check it, and export files the stores accept.
1. Create your account
- Open the app and choose Create an account.
- Enter your email and a password, then open the confirmation email we send you and click the link.
- You're in. Your account works on any computer, tablet or phone: sign in with the same email.
Just looking? Choose Try it without an account. Your book is kept in that browser only, and you can create an account later without losing it.
2. Start your book
The first time you open the app you'll see a short sample book, The Salt Road, so you can explore. When you're ready:
- Bring in a manuscript: Import → Word, Markdown or text file. Headings in your document become chapters, and italics and bold come across. You can also Paste text from Google Docs, Scrivener or anywhere else.
- Start from nothing: Export → New book.
The list on the left is your book in order: Front matter (title page, copyright, dedication, contents), your Chapters, and Back matter (about the author, ebook cover). Click anything to edit it. Use Add chapter to add one; hover a chapter to move it up, down or delete it.
To switch between books, click the book's name at the top left.
3. Write and edit
Three views sit above the page:
- Write: just the editor.
- Split: the editor beside the printed page, which follows your cursor as you type.
- Pages: the whole book as two-page spreads, exactly as it will print.
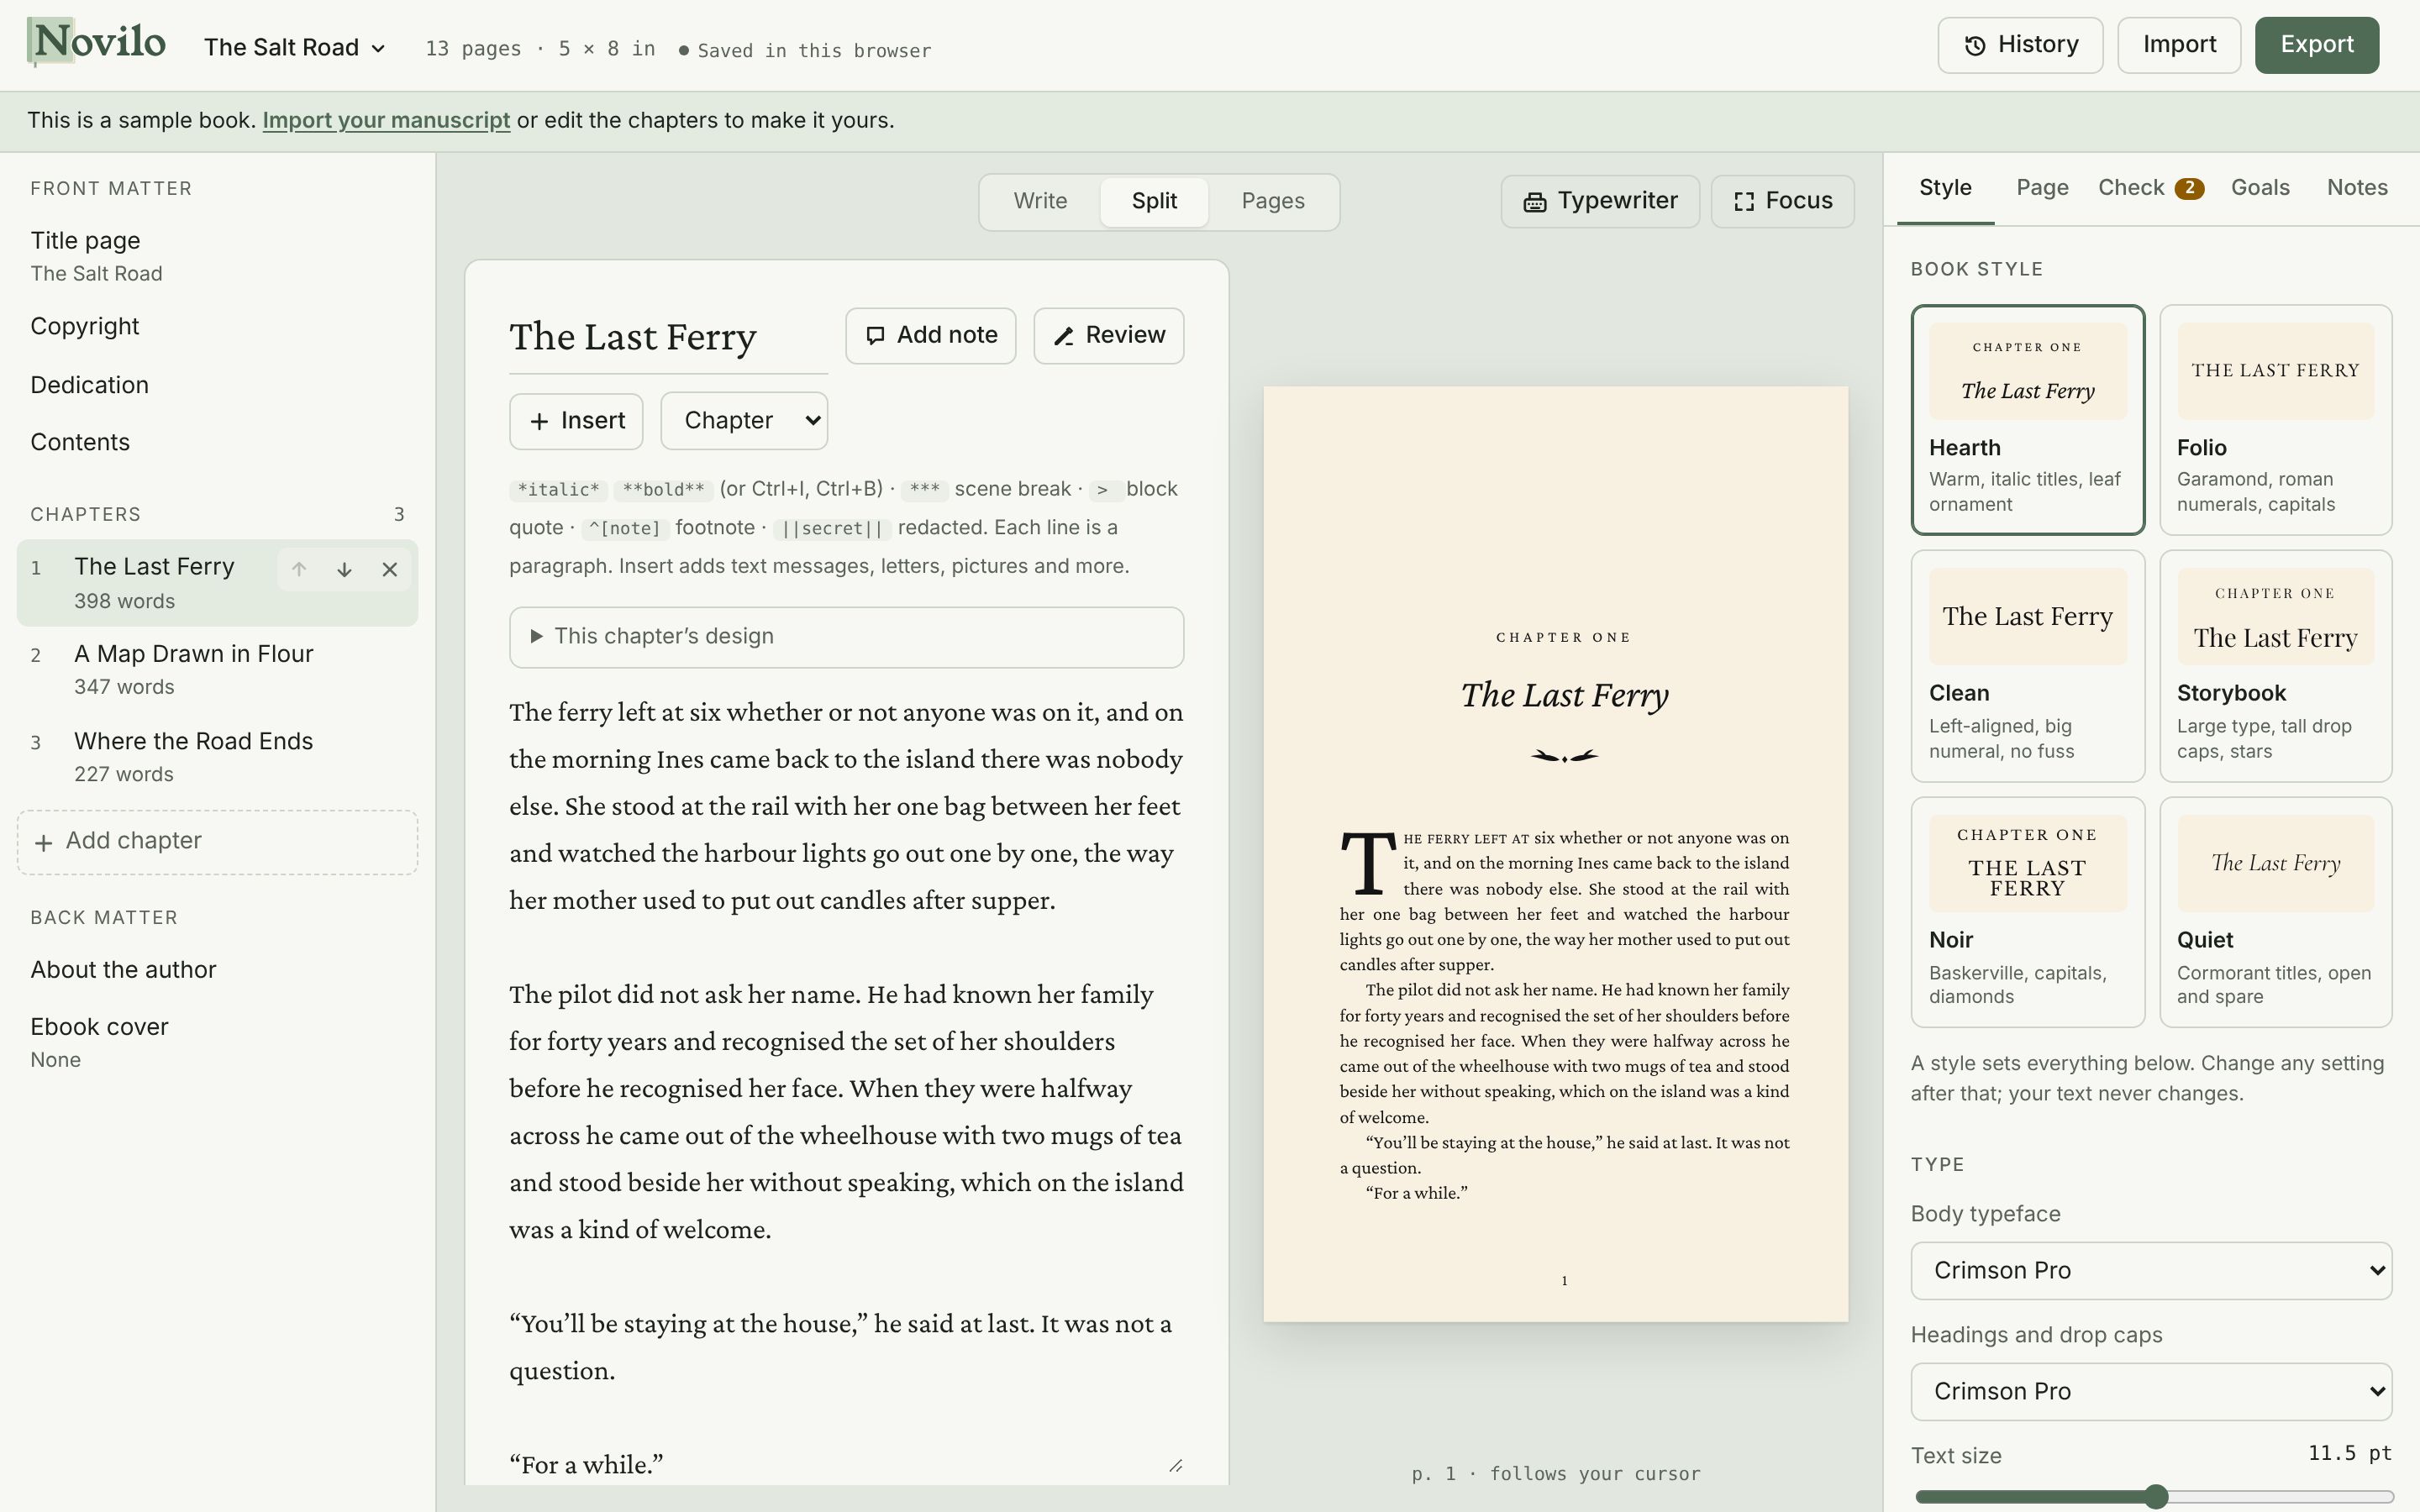
Each line you type is a paragraph. A few simple marks do the formatting:
| Type this | To get |
|---|---|
*words* or Ctrl/⌘+I | italics |
**words** or Ctrl/⌘+B | bold |
*** on its own line | a scene break, drawn with your book's ornament |
> at the start of a line | a block quote |
^[your note] | a footnote |
||words|| | redacted text, printed as a black bar |
[page break] on its own line | a new page |
Everything saves as you type. The top bar shows where: Saved to your account or Saved in this browser.
4. Typewriter and focus modes
Choose Typewriter above the page to write on a sheet of paper in a typewriter, one letter at a time, with key and bell sounds. Choose Focus for a calm, full-screen page with a normal blinking cursor. Either way, everything you type goes straight into the chapter you were on.
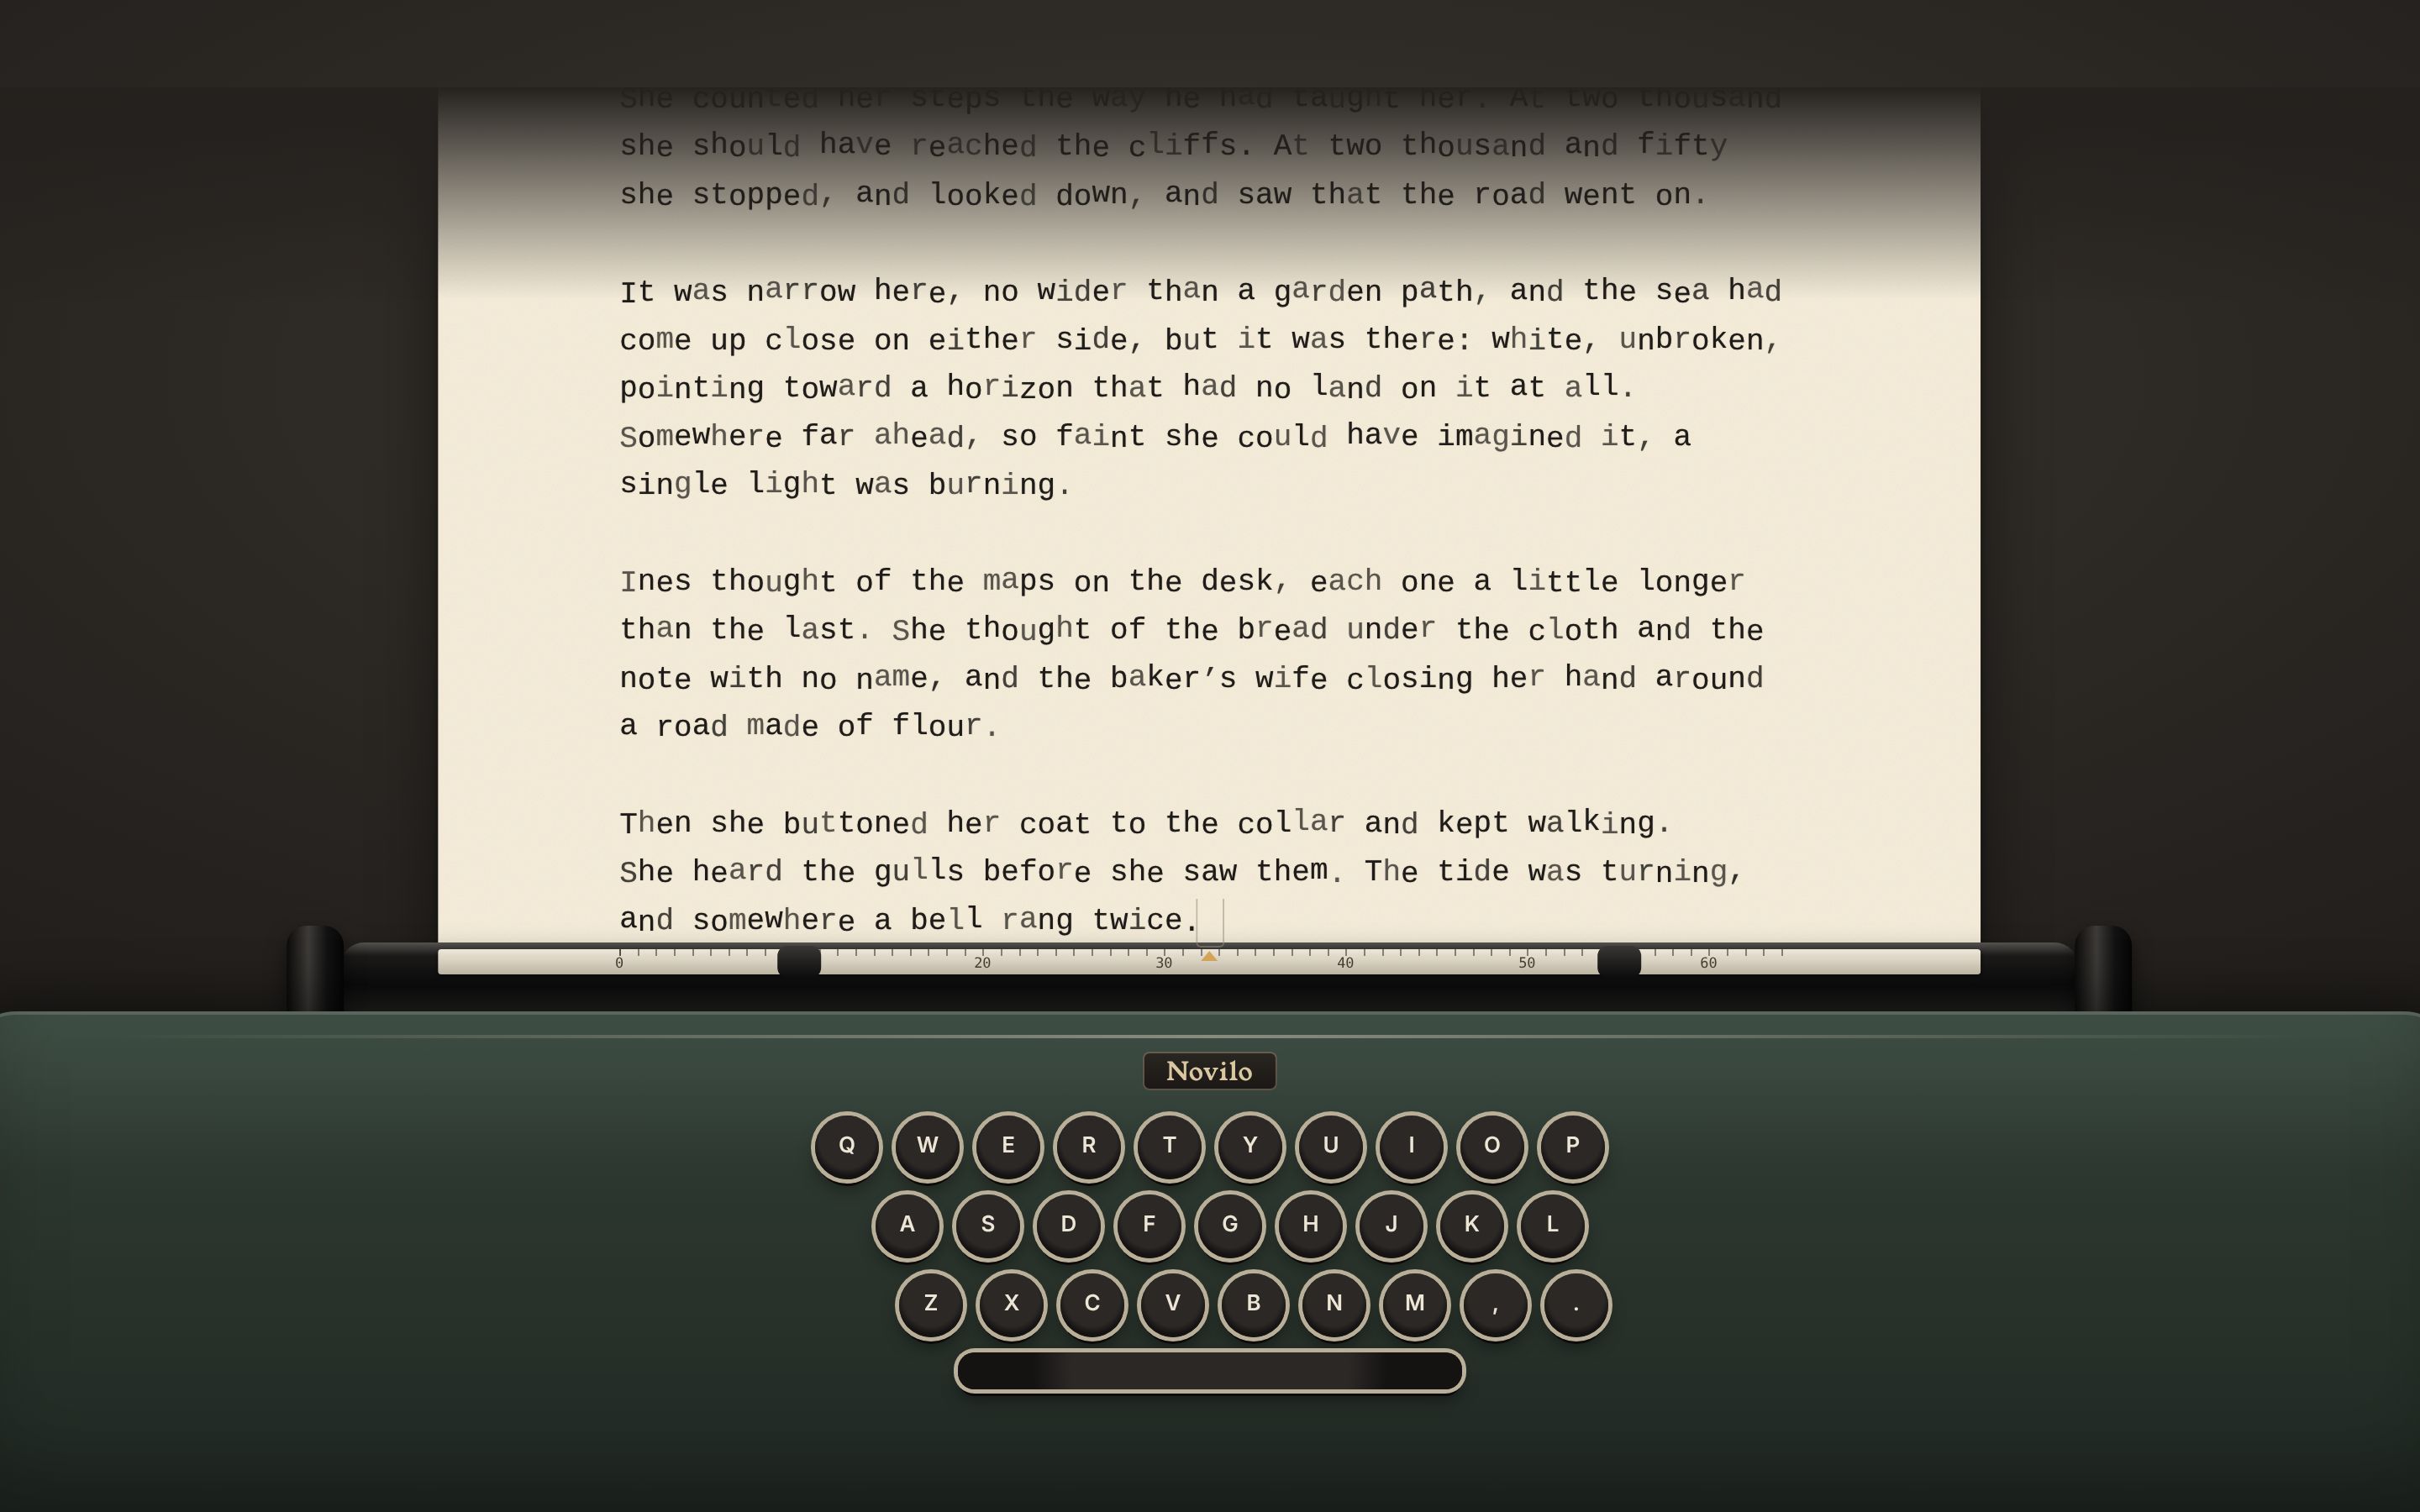
- Aa Settings (top right) changes the paper or theme, typeface, text size, line length, soft focus and a session word goal. In typewriter mode, the speaker button turns the sounds on or off.
- In typewriter mode, scroll up to roll the paper back and read what you wrote.
- Press Esc to go back. Ctrl/⌘+Shift+F opens and closes focus mode from anywhere.
5. Texts, letters, footnotes and pictures
Put your cursor where you want something and choose Insert in the editor.
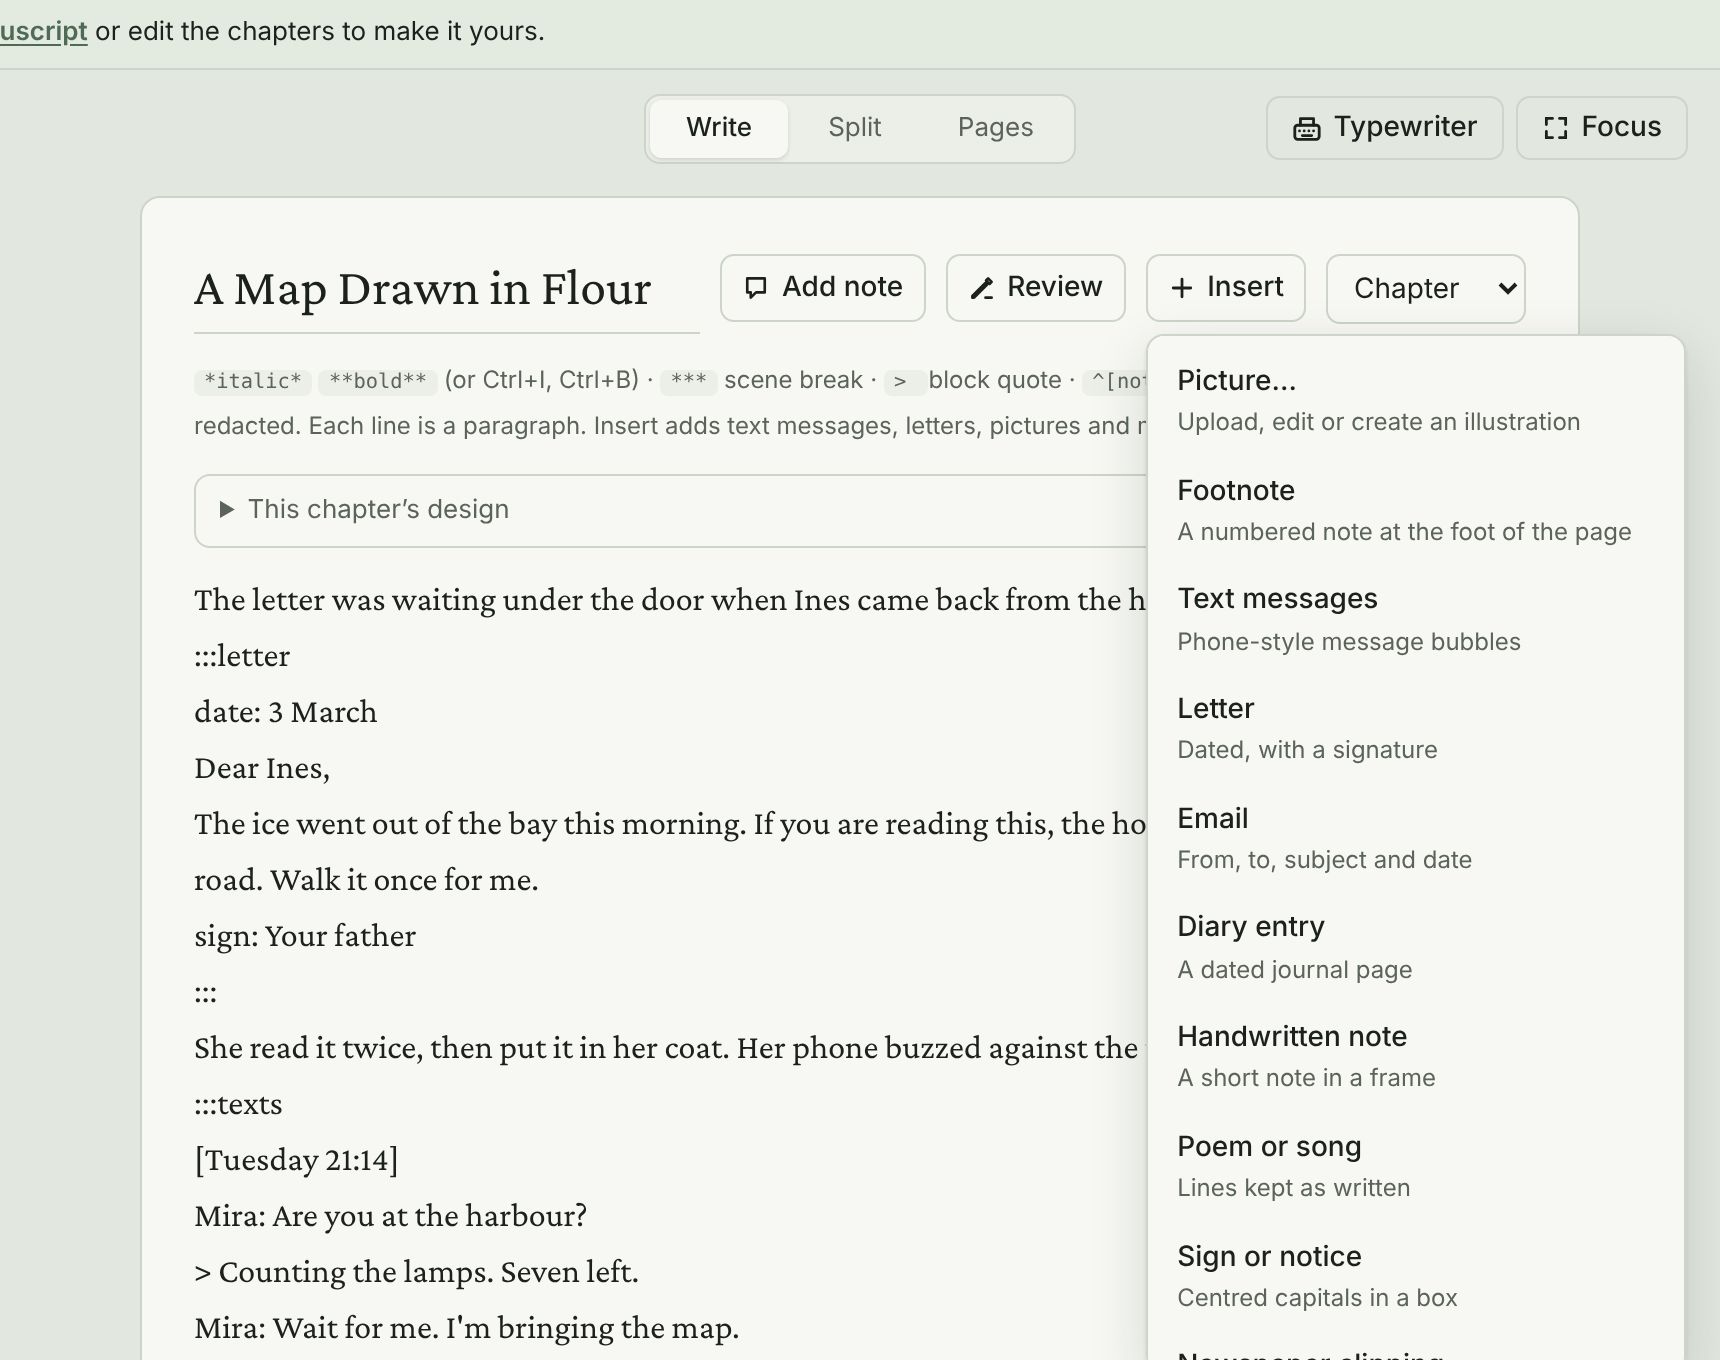
- Story blocks (text messages, letters, emails, diary entries, notes, poems, signs, newspaper clippings and case files) arrive as a short example between
:::lines. Replace the example with your own words. In text messages, lines that start with>are your main character's messages, shown on the right. - Footnote wraps any selected words in
^[ ]. Choose where notes print under Style → Notes: the foot of the page, the end of each chapter, or the back of the book. - Picture… opens the picture tools:
- Upload a photo, map or drawing, or Create with AI by describing it and choosing a style.
- Crop, rotate, flip and adjust it. For black-and-white printing, choose Greyscale or Line art.
- Add a caption and a description for screen readers, then choose In the text, Full page or Edge to edge.
- The note under the picture says whether it's sharp enough to print at that size. Aim for 300 pixels per inch.
6. Design your book
The Style tab on the right sets the look of every page. Start by choosing one of the six book styles, then fine-tune the typefaces, text size, line spacing, chapter openings, drop caps and scene-break ornaments. Your words never change, only how they're set.
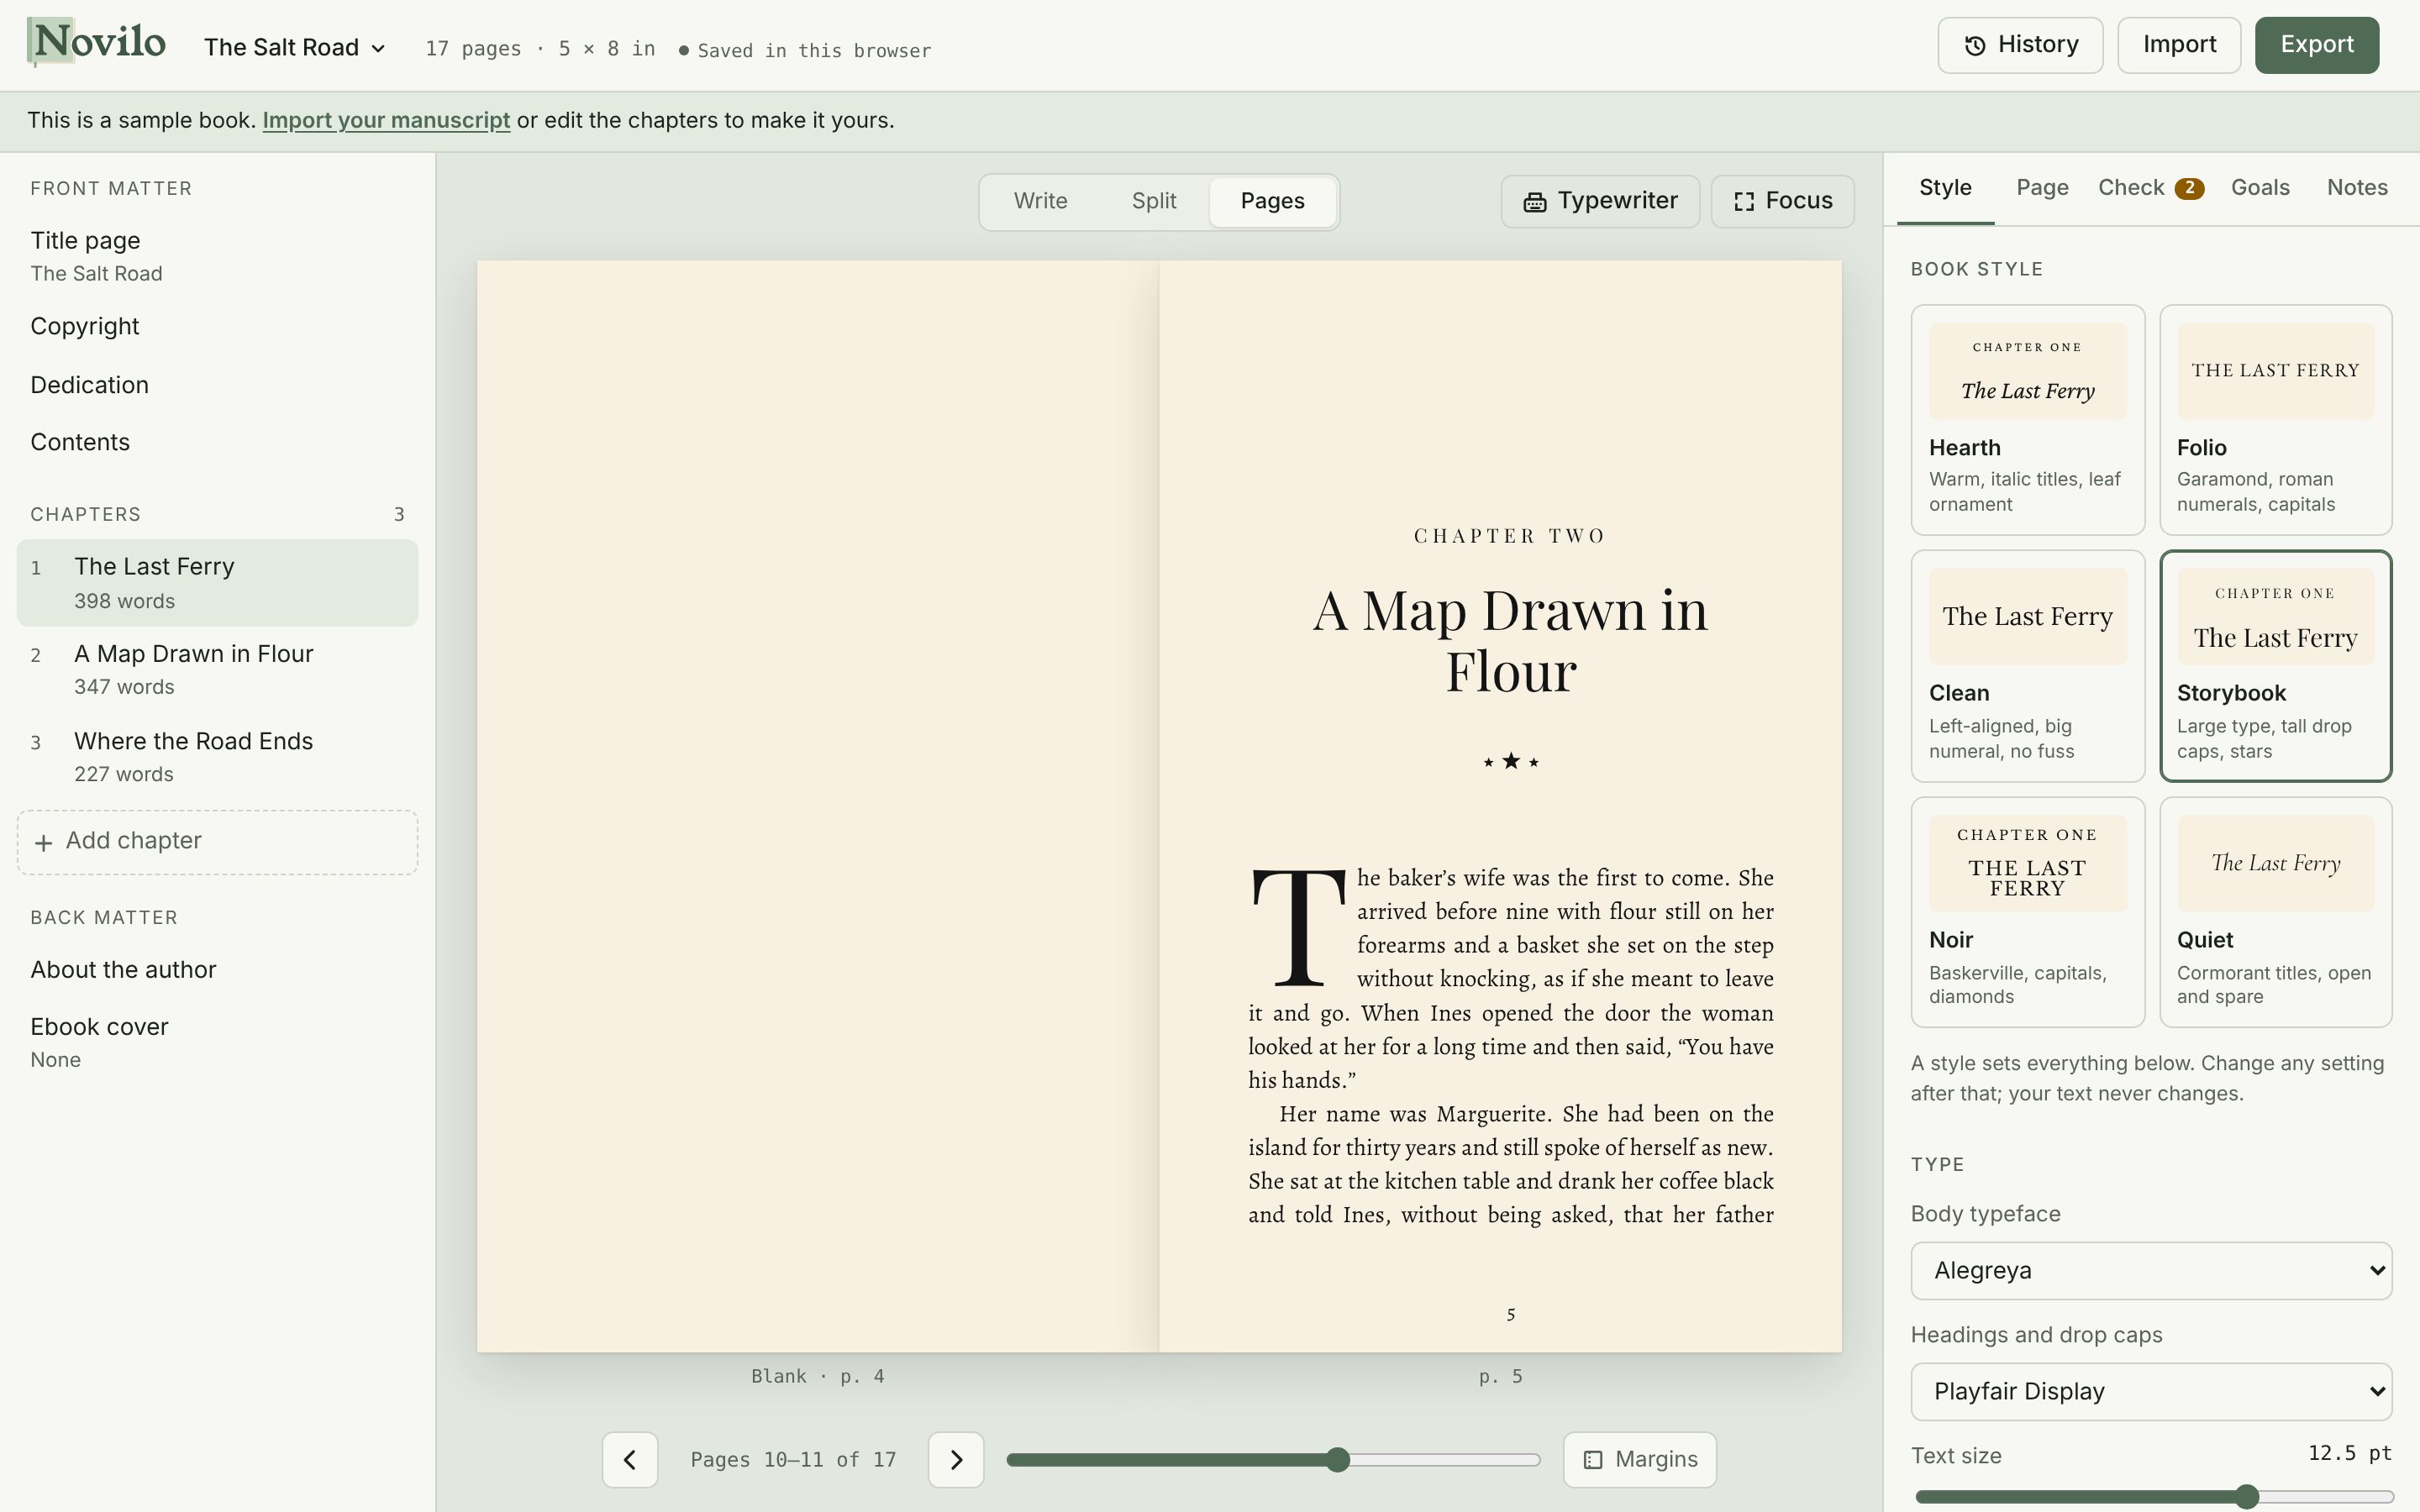
- One chapter different? In the editor, open This chapter's design to change its ornament, drop cap, opening depth or starting page, or to put a picture above its title.
- Parts: set a chapter's kind (beside Insert) to Part to give it its own page, like "Part One: The Coast". Prologue, interlude and epilogue are there too.
- The Page tab sets the trim size (5×8, 6×9 and others), paper colour, margins, running heads and page numbers. The inside margin grows automatically as your book gets longer, as KDP requires.
7. Versions, goals and notes
- History (top bar; on a phone it's under Export): Novilo saves a version every 15 minutes while you write. Save your own named versions too, keep whole alternate drafts, compare any version with today word by word, and restore with one click.
- Goals tab: set a word count and a deadline and see the daily pace you need, your streak and twelve weeks of writing days.
- Notes tab: select some words and choose Add note to pin a margin note to them. Reply to notes and resolve them when you're done.
8. The AI editor
Choose Review in the editor. Pick Proofread for spelling, grammar, punctuation and typos, or Edit for notes on clarity, repetition, pacing and word choice. Select text first to review just that part.
- Nothing changes until you choose Apply on a suggestion. You can also jump to it in the text, save it as a margin note, or dismiss it.
- Apply all spelling, typo and punctuation fixes accepts the safe, mechanical ones in one go.
- Your writing is sent for that review only and is never used to train AI models.
9. Check before you publish
The Check tab looks over the whole book: page count, inside and outside margins against KDP's rules, empty chapters, a missing title, author or cover, and any characters the fonts can't print. It also shows your spine width for the cover designer. A number on the tab means something needs a look.
Then page through Pages view from start to finish, the way a reader will.
10. Export and publish
Open Export:
- Print PDF: your paperback or hardcover interior, fonts embedded, ready to upload.
- EPUB ebook: for Kindle, Apple Books, Kobo, Google Play Books and Barnes & Noble. Add your cover first under Back matter → Ebook cover (1600 × 2560 pixels is ideal).
- Reader copies: a copy for each beta reader or reviewer, watermarked with their name.
- Sample PDF: free on every plan; your opening pages, to see your book in print.
- Save project file: a complete backup of your book you can open again any time.
Publishing on Amazon KDP
- Sign in at kdp.amazon.com and create a Paperback.
- On the content page, choose the same trim size and paper as on your Page tab, and "No bleed" unless you turned bleed on.
- Upload your Print PDF as the manuscript, and your cover. Your spine width is on the Check tab.
- Open KDP's Previewer and page through. It's the final word on what prints.
- For the Kindle ebook, create a Kindle eBook and upload your EPUB.
IngramSpark, Draft2Digital, Apple Books and Kobo Writing Life take the same two files.
11. Your subscription
Writing, designing, previewing and sample PDFs are free. A subscription ($9.99 a month or $99 a year, with a 7-day free trial) adds the full Print PDF and EPUB, saving to your account across devices, the AI editor, AI illustrations and reader copies.
- Subscribe: choose any Pro feature, or your account button (top right) → Upgrade to Pro.
- Change plan, update your card, see invoices or cancel: account button → Manage subscription. If you cancel, you keep Pro until the end of the period you paid for.
- If your subscription ends, nothing is deleted. Your books are copied into your browser and you can keep writing for free.
Still stuck? Email [email protected] and a real person will help.